If you’re stranded in the desert, water is your life-giving salvation. When that same water is seeping into the parts of your house that are supposed to be dry, you hate that water more than anything in the world.
Between flooding, plumbing accidents, and pipe failures, there are countless ways you can get water damage. It happens to the best of us, but what matters most is how you react to it.
To keep your damage to a minimum and get your home back to its sparkly self, follow our professionals’ water damage cleanup tips.
1. Make the Repair a Priority
Time is critical when it comes to water damage for several reasons.
First, in many cases, the damage comes from a water source that continues to run. The sooner you cut off the source, the less water there will be to cause damage.
Second, the more time that water sits on a surface, the more it will seep into that material. That means deeper damage and higher costs.
Finally, treating water damage right away is essential to preventing mold. It takes just 24-48 hours for mold to start growing on a damp surface.
The moment you see that you have water where it shouldn’t be, cut off the source of the water and call a water damage remediation professional.
2. Determine What Kind of Water is Causing the Damage
All water damage is bad, but some types of water are far worse than others. Depending on what is in the water, it can be a health hazard for anyone to handle it.
There are three key types of water. Clean water, sometimes called white water, is unused water. This includes rainwater that hasn’t touched soil as well as clean water from your pipes.
Gray water is water that has been used but does not contain sewage. This includes used water from your shower, washing machine, dishwater, and so on.
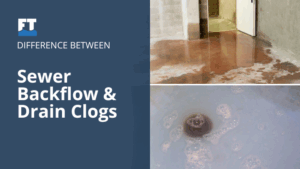
Finally, black water is water that contains raw sewage, leaking from your toilet or sewage system.
Determining where the water comes from it the best way to know how clean it is. When you call your remediation team, let them know what type of water it is so they can take precautions for their health.
3. Communicate with Your Insurance Company from Day One
After calling in the water remediation experts, your next call should be to your insurance agency.
Find out the details of what your policy covers if it covers water damage. You may have monetary limits or it may require them to approve repairs in advance.
Getting in touch with your insurance company from the start establishes a cooperative working relationship between you. They’re likely to be more generous with their reimbursements and their flexibility. It also helps you speed the process along so you can get back on your feet sooner.
4. Go Overboard on Drying
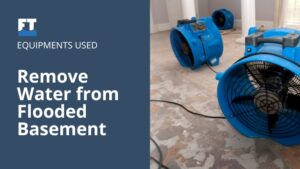
One of the first steps your remediation expert will take is to drain the water and dry out all the affected areas. This usually involves setting up large fans and letting them run for a certain number of hours or days.
It’s important that you keep the fans on longer than you think is necessary. It’s common for homeowners to check their surfaces after a few hours and turn off the fans because the home feels dry enough. Unfortunately, moisture can be hiding below the surface, leading to serious issues like rot and mold.
Follow your remediation team’s recommendations to a tee and err on the side of caution. The fans may be noisy but they’re far better than facing thousands of dollars in hidden damage or mold-related health issues later.
5. Prioritize the Repairs
Let’s consider a common type of water damage: water leaking through a roof and down into the home. Depending on where the leak is, you’re likely to have water damage on the ceiling, floor, and wall.
When you have damage on multiple surfaces, prioritize those that are safety risks. Usually, that means fixing the ceiling first because it can collapse under the pressure of gravity. Your next step would be to fix the floor so no one falls through it, and finally to fix the walls.
6. Get a Structural Assessment
As any contractor knows, it’s never safe to assume which beams and elements are critical to a home’s structure.
In the process of fixing water damage, you may need to remove some sections of wood such as studs or beams. The way you replace them will depend on whether they’re weight-bearing.
As a result, before you make any moves, make sure a professional can determine whether your damaged wood is structurally essential and tell you the safest way to proceed. This is one of many reasons we never recommend taking a DIY approach to water damage repair.
7. Plan Future Preventative Measures
No matter how smoothly your water damage remediation goes, no one wants to make it a regular habit. While getting your home repaired, you also need to investigate why the water damage happened and plan a way to prevent it in the future.
This could mean updating the corroded pipes in your home. It could involve waterproofing your basement against rainwater or replacing your roof. The extra expense today could save you far more in the future
Using the Best Water Damage Cleanup Tips for Your Home
Water damage isn’t an issue any homeowner wants to deal with but it happens to so many of us at least once. By taking control of the situation, calling a professional, and sticking to these water damage cleanup tips, you can keep the damage to a minimum and get back to life as normal.
To resolve your existing water damage, call our water damage repair experts today.